Deploy Bokeh Server Plots Using Heroku
This is a small blog post, guiding you with steps to deploy a bokeh python server plot using Heroku. There are very little resources online, that outline these processes. The documentation is not very clear (least I found it confusing, when different people suggest different methods) and hopefully this blog provides a clear guideline.
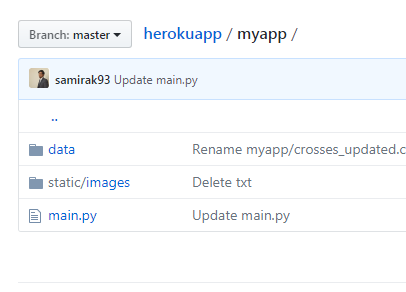
Assuming you’ve your server plot ready to be deployed, let’s begin by creating folders, in Github repository, that’d be required for heroku. My herokuapp GitHub repository has the following folders directory.
myapp (folder)
|
+—data (folder)
| +—data.csv
|
+—main.py
+—static (folder)
| +—images (folder)
| | +—images.png
This is how my repository looks like.
This is easy since this is how you’d have setup your folders to run the “myapp” locally in your system.
Now, go to http://heroku.com and create a free account or login to your existing account.
Once you login, create a new app and remember the name of the app. We’d need to mention the app name in later steps.
The main part of the process, creating text documents for heroku, is the trickiest part. There are various answers online on creating these documents. I had to trial out few methods before getting it right.
So the whole myapp folder is within my main repository, herokuapp. Inside herokuapp, you’d have to create 3 more documents. Note that these file names are case sensitive.
- Procfile
- requirements.txt
- runtime.txt
Procfile
web: bokeh serve --port=$PORT --allow-websocket-origin=heroku_app_name.herokuapp.com --address=0.0.0.0 --use-xheaders myapp
This is where you’d have to mention your app name (created in heroku). replace “heroku_app_name” above with the name of your app. Don’t change anything else in the procfile. “myapp” in Procfile refers to the folder you’ve created within the GitHub repository.
This Procfile is similar to the command “bokeh serve --show myapp” that we’d run to display the server plot locally.
requirements.txt
bokeh==0.12.15
Jinja2==2.10
MarkupSafe==1.0
numpy==1.14.2
pandas==0.19.2
PyYAML==3.10
requests==2.18.4
scikit-learn==0.19.1
scipy==1.0.1
tornado==5.0.1
The issue I’d faced with requirements is that bokeh and tornado version has to be correct, to avoid timeout errors on heroku. So I figured it out (from stackoverflow and other GitHub bokeh chat) that tornado version has to be mentioned as 5.0.1. Apart from scikit-learn (which I needed for my code), all the other requirements are mandatory (bokeh server plot uses them). Incase you use other libraries in your python code, add them in the list along with their versions.
runtime.txt
python-2.7.14
Note:- Heroku supports only 2.7.14 version, if your python version is 2.7.
Once you create the 3 files, the repository herokuapp looks like this.
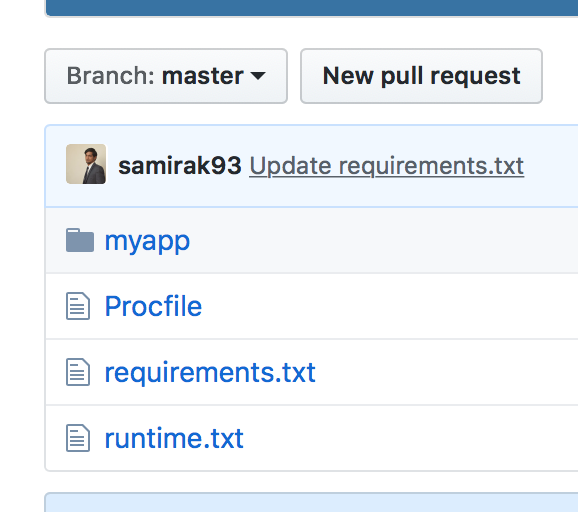
herokuapp (GitHub repository)
+-Procfile
+-requirements.txt
+-runtime.txt
+—myapp (folder)
Now it’s time to deploy the bokeh plot. You could use git commands to deploy the files from command/terminal, or you could manually deploy it from heroku dashboard (which I’d explain here).
Go to the heroku dashboard (https://dashboard.heroku.com/apps/) and select the app you’ve created. Once inside it, go to the “deploy” tab and select “Deployment method” as GitHub and connect your GitHub account with the app.
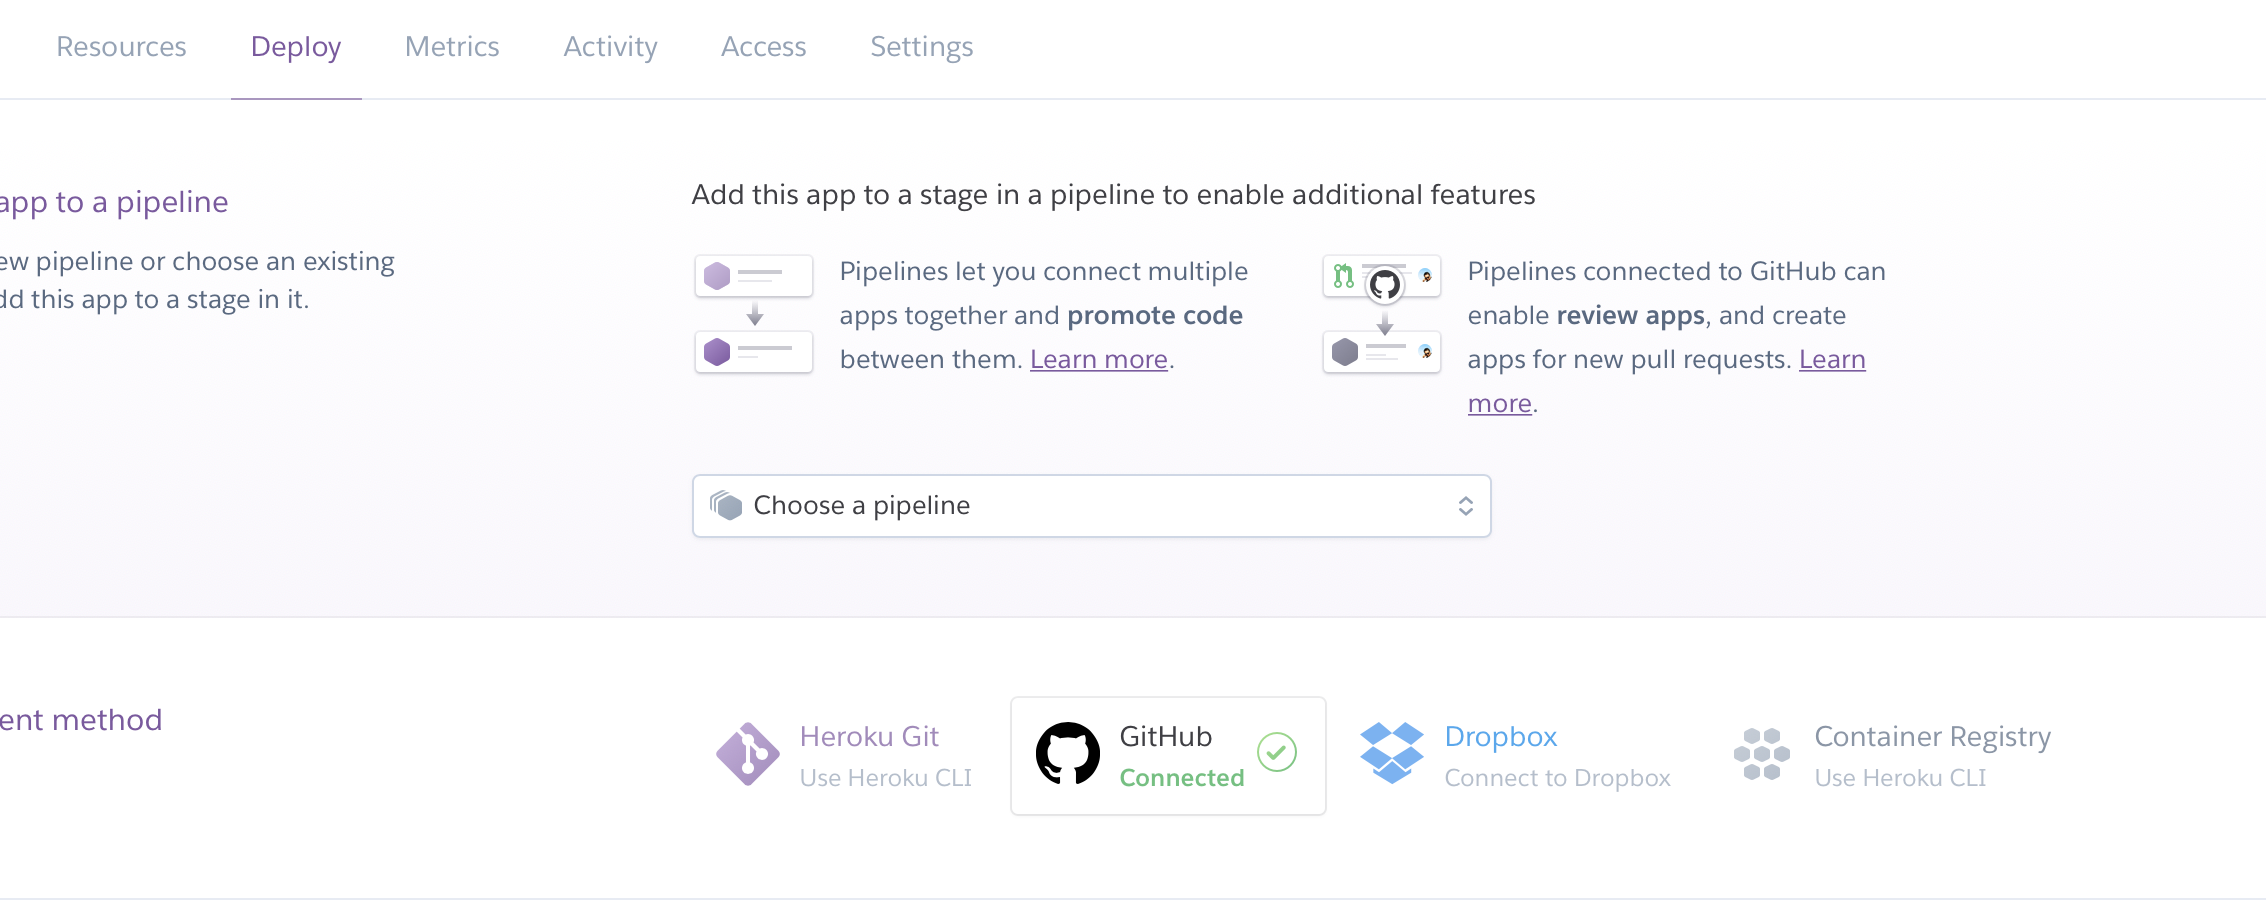
Once that is completed, scroll down and select the repository you’ve created for the bokeh plot. The repository can be selected from “App connected to GitHub” on the same deploy page. In my case, the repository is herokuapp.
Once that is done, you can either choose “Automatic deploy’, which will deploy and update the app automatically, every time you make a commit to the repository.
Else you could select “Manual deploy” and deploy the repository manually each time you update the repository. You can check build log inside “Build **master“**. Any error (in requirements/runtime txt files) will be shown here.
After successful deployment, you can view the app from https://your_app_name.herokuapp.com/myapp
Note: Since you’re using a free version of herokuapp, there’d be some delay in rendering your plot online.
The app log (post deployment) can be seen by selecting more–> view logs in your app dashboard page.
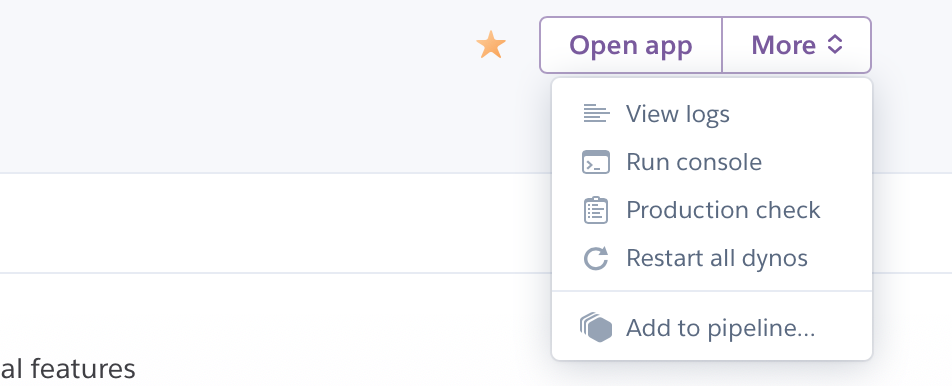
All the runtime issues and errors will be provided on the log.
You can find my bokeh server plot hosted here
Hope this blog post provides a clear explanation and helps you to deploy your own bokeh server plots on Heroku.
You can find my contact information on my contact page.
Any comments/feedback are always appreciated.
Thanks.